


Brush the Dust Off: Identifying and Cleaning Glass Plate Negatives
Posted by Jane Metters LaBarbara.September 2nd, 2014
Blog post by Jane Metters LaBarbara, Assistant Curator, WVRHC.
The West Virginia and Regional History Center is in the middle of a project to digitize some of our glass plate negatives. Previous blog posts have discussed the glass plate negatives of the Fred T. Newbraugh collection (scans online here) and the James Green collection (scans online here). From those posts, we learned about the evolution of glass plate negative technology, from the time-sensitive “wet collodion” process in the mid to late 1800s to the “dry” process that arose in 1880. Now we’ll learn how WVRHC staff members are cleaning a century’s worth of dust and dirt off of our glass plate negatives to preserve and provide access to our region’s history.
First, How to Identify Glass Plate Negatives
Glass plate negatives need to be made of glass; other types of negatives are made on paper, gelatin, acetate, or nitrate. If you have a glass photograph, check to see whether it is a negative. In a negative, the light areas of the photograph’s subject appear dark and the dark areas appear light. If your glass photograph is not a negative, you probably have an ambrotype! If you do have a glass plate negative, it could be one of two types.
Collodion wet plates date from 1851 to roughly 1880. The plates were coated by hand, making the coating often uneven at the edges, and the edges of the glass were often ground rather than cut. They are varnished and often have a brown or red tint.
Gelatin dry plates were in use from roughly 1880 to as late as 1975. The plates were machine coated, with even coating at the edges. The edges were cut rather than ground. These plates were occasionally varnished and tend to have a neutral grey to black image tone (sometimes they look vaguely purple). To learn more identifying characteristics, check out the Graphics Atlas Gelatin Dry Plate Negative Identification webpage and Wet Plate Collodion Identification page.
Why We Clean
We clean our glass plate negatives to help us provide better access to them and to help us preserve them. Getting the dirt off the plates minimizes the chances of continued deterioration, and also enables us to get the best possible scans of the plates. These scans are added to our online photos database at West Virginia History OnView so people can view these fantastic images without having to actually handle them. When plates are handled less often, they are less likely to deteriorate quickly.
(Please note, we don’t recommend that anyone try to clean their photographic materials at home without consulting a professional first!)
Step 1: Preparing to Clean
Start with a clean, dry, flat work surface and a pair of nitrile or latex gloves. Select the negative you will be cleaning and determine which side is the glass side and which is the emulsion side. (Hint: the emulsion side is the side on which the image is captured, and it tends to look duller than the glass side.)
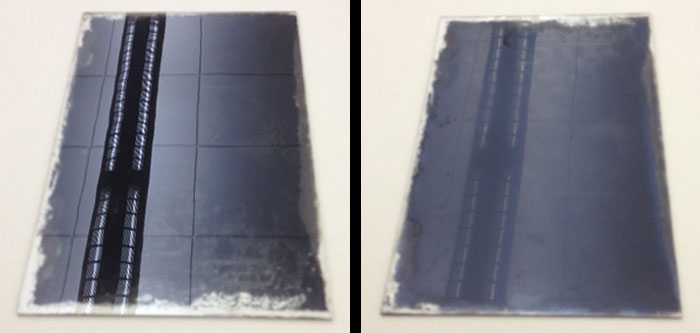
The image on the left shows the glass side face up; on the right, the duller emulsion side is face up.
Once this plate was cleaned, scanned, and turned into a positive image, it looked like this.
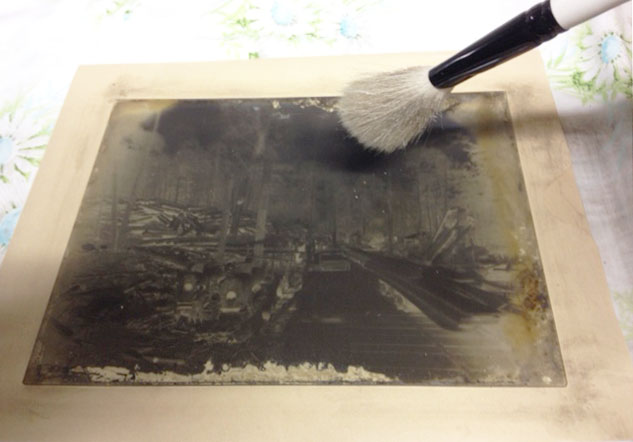
Step 2: Brush the Emulsion Side
Use a soft brush (we use a dusting brush with goat hair bristles) to gently clean the emulsion side of the plate. This removes dirt and any broken glass particles without scratching the emulsion. Don’t clean this side with water–that would risk washing off the emulsion!
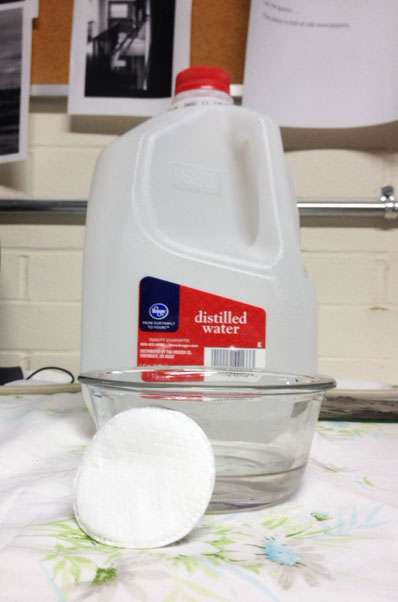
Step 3: Gently Wash the Glass Side
Lay the plate emulsion side down on a clean surface and gently wash the glass side. We use distilled water and cotton rounds.
Step 4: Dry the Plate
One of our staff members set up this drying rack to keep plates organized and vertical while they dry.
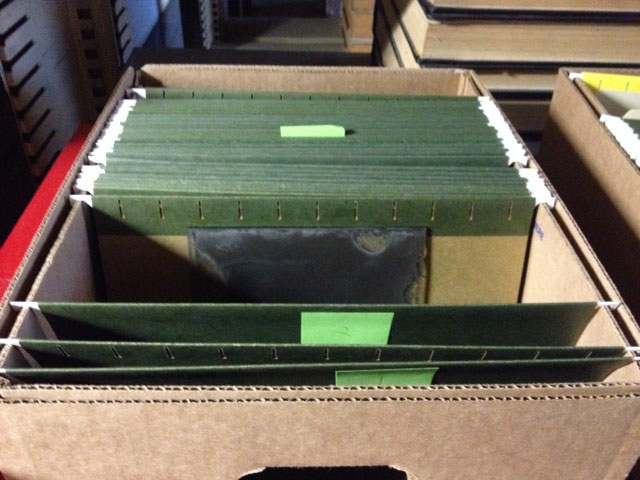
Step 5: Archival Storage
Clean, dry plates are stored in individual acid-free folders or envelopes, within acid-free boxes. Storing them vertically is recommended by the National Archives and Records Administration—they are less likely to crack from pressure or to have the emulsion rubbed off if they are stored on their edges rather than flat.