Q&A Interview with 2026 Mountain Artist-in-Resident L. Renée
Posted by Admin.April 20th, 2026
With WVU Art in the Libraries Curator, Sally Jane Brown
As the curator for WVU Art in the Libraries, my goal in developing the Artist in Residency program with the West Virginia and Regional History Center (WVRHC), was to bridge the gap between our sprawling archival collections and the lived experiences of the Appalachian community. Often, archives are viewed as static repositories or perhaps rows of gray boxes holding “official” histories. However, when we invited poet L. Renée to serve as our Artist-in-Residence, those boxes became sites of active excavation and profound narrative reclamation.
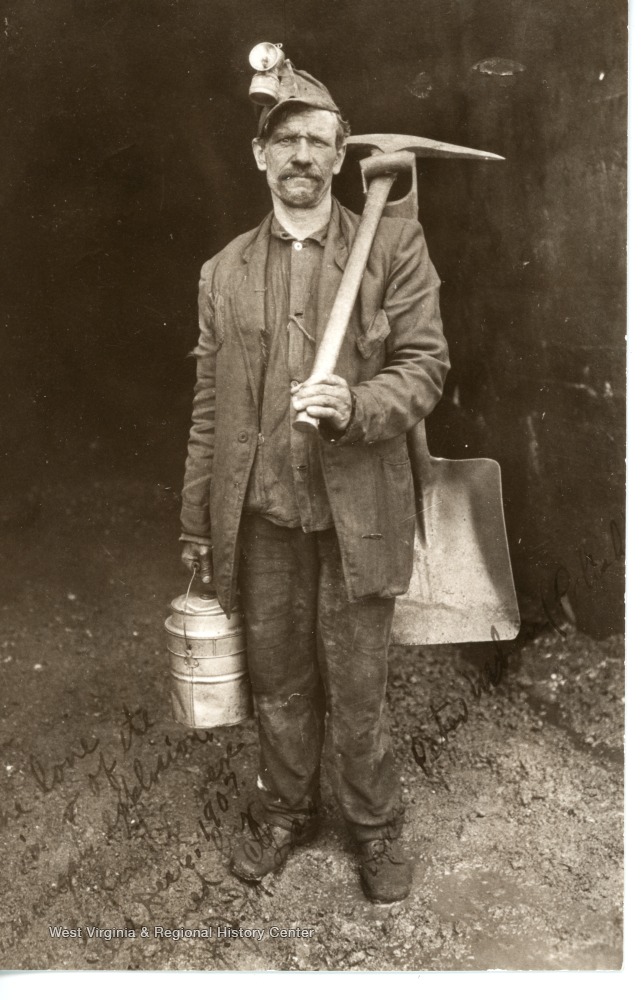
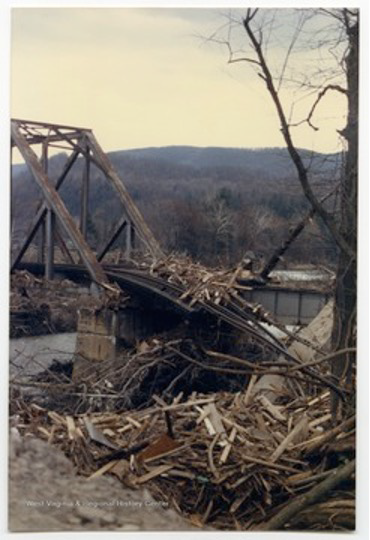
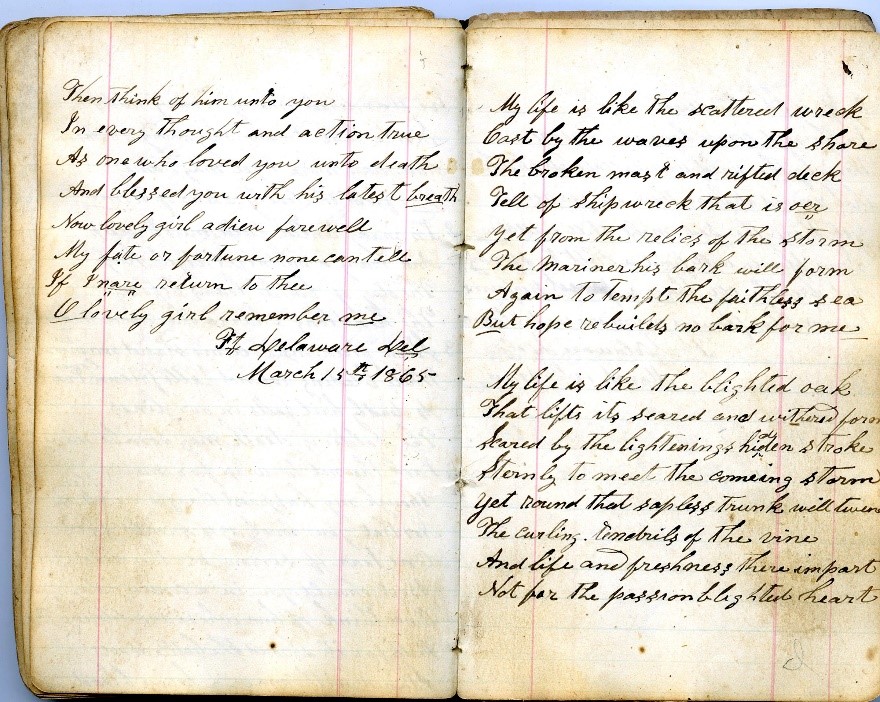
L. Renée’s project, “Remain,” is a breathtaking synthesis of poetic craft and environmental witness. While her debut collection, “Holler Root,” traces the path of her own family’s migration, “Remain” widens the lens to the very bedrock of our region. Through her residency, she navigated the WVRHC, sifting through hundreds of pages of coal company correspondence, environmental impact reports, and the devastatingly intimate “Photovoice” records of Southern West Virginia residents.
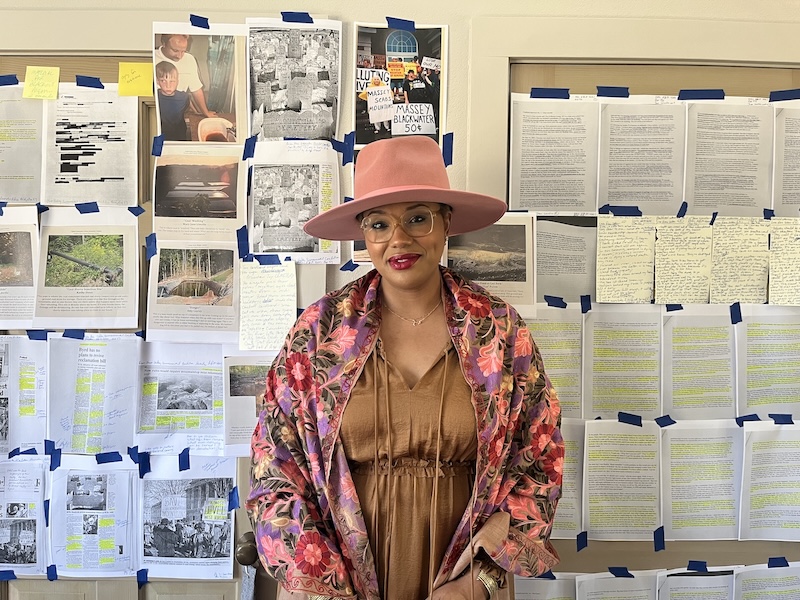
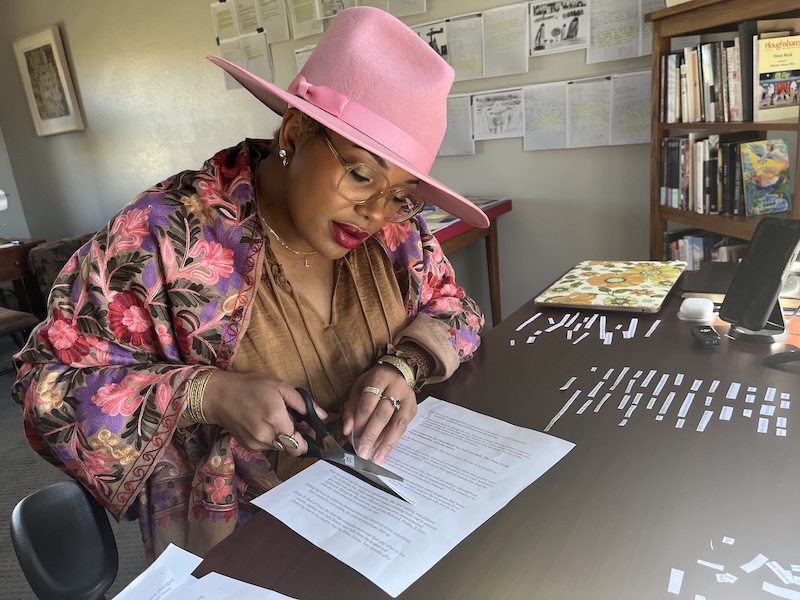
What makes L. Renée’s work so vital to the library space is her use of erasure poetry. By physically and linguistically “erasing” the corporate jargon and strategic communication found in coal industry documents, she uncovers the “remains;” the hidden truths and human costs buried beneath the administrative surface. Moreover, the contrapuntal poetry exemplifies L. Renée’s painstaking physical process. This is not digital erasure; it is a tactile, manual labor of “cutting out.” By physically removing layers of corporate jargon and administrative doublespeak from archival documents, she mimics the “removal” seen in the landscape itself. Each cut is a deliberate act of uncovering the human story buried beneath the surface; a slow, meditative reclamation of the “remains.”
The following interview was conducted while L. Renée was in residency at UCROSS in Wyoming, reflecting back on her time in the WVU stacks. Here, she discusses the “geological archive” of mountaintop removal, the burden of industrial inheritance, and the role of the poet as a steward of communal memory.
In “Remain,” the archive is no longer silent; it breathes, it mourns, and it demands a more sustainable future.
— Sally Jane Brown, Curator, WVU Art in the Libraries
I. The Archival Process & “Remain”
SJB: In your WVU project, “Remain,” you are working with environmental and community archives. How does your approach change when moving from the “patrilineal archive” of family records to the “geological archive” of mountaintop removal?
LR: Great question! In many ways, my approach is the same: I endeavor to distill information in a way that is accessible to the reader with images and sounds that linger in the mind. The key difference for me with this project is the volume of information. I probably reviewed more than 600 pages of material — documents, correspondence, photographs, inspection reports, lawsuits, environmental impact statements, public hearing testimony, newspaper clippings— in a few weeks for Remain. My goal was to surround myself with varying aspects of this topic and see what rose to the surface to make work from. What was striking? Haunting? Complex?
SJB: : What specific documents or photographs in the WVRHC have surprised you or provided an “aha” moment similar to finding your grandfather’s doctor in the LOC records?
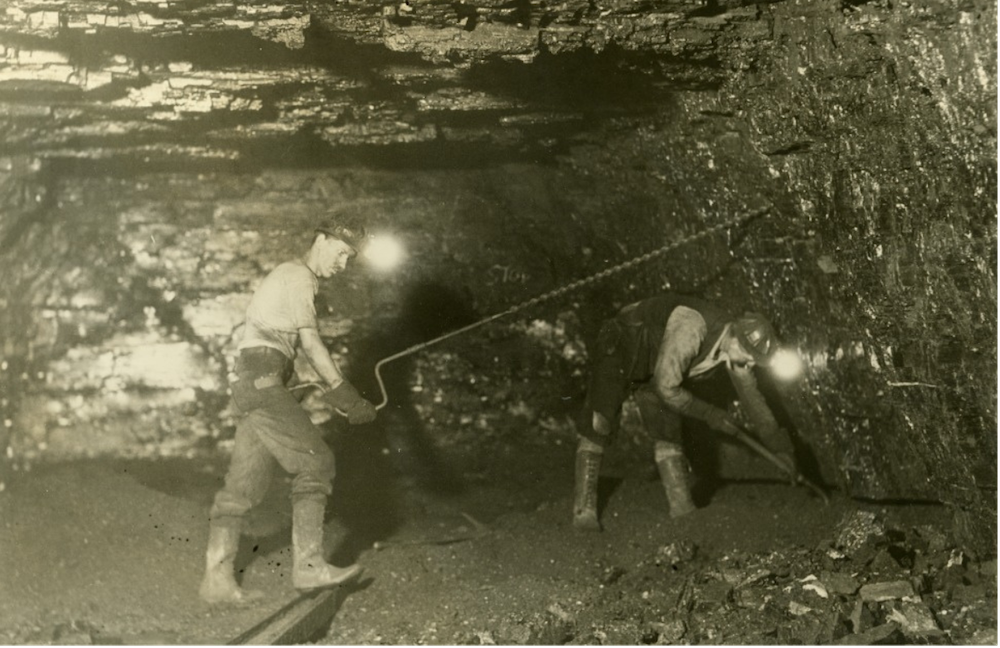
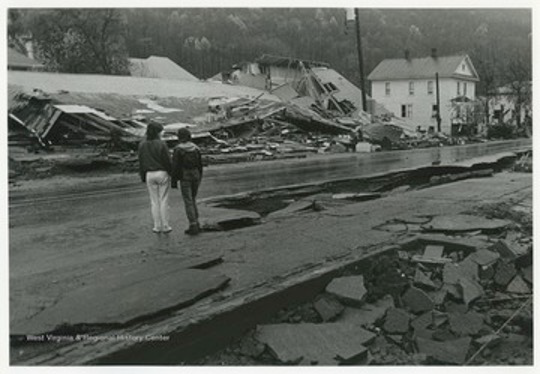
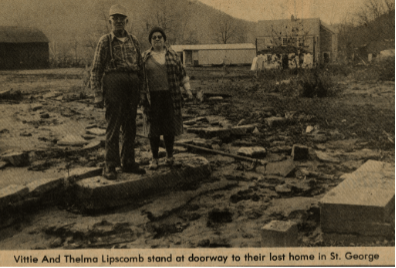
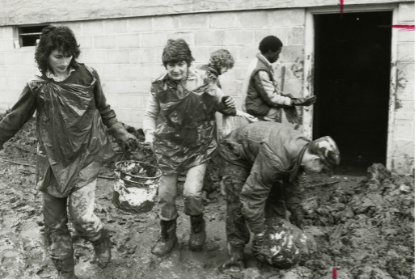
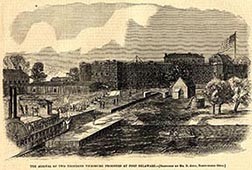
LR: Oof! I had so many moments in my research that stopped me in my tracks. The Coalfield Interviews (Ohio Valley Environmental Coalition Records, A&M 4661, Box 72) deeply impacted me. Various residents from different communities were interviewed about how mountaintop removal impacted them and their stories were just devastating: illness, contaminated water, receiving threats due to their advocacy work. Equally, the Southern West Virginia Photovoice Project (Ohio Valley Environmental Coalition Records, A&M 4661, Box 59) captures arresting photographs and stories from 40 women across Southern West Virginia. From coal slurry ponds to sinks spewing red-brown water, there is much to take in. Photos showing mountaintop removal mining on Kayford Mountain (Ohio Valley Environmental Coalition Records, A&M 4661, Box 13) knocked me over so much that I wrote an ekphrastic poem about it. Separately, I read more about Larry Gibson and his family’s generational connection to the land.
Lastly, I’d say the case files from mining board reviews offered a glimpse at coal mining operation inspections, mining company violations, and how officials responded to some lawsuits filed by citizens (Rauch, Henry, Geology Professor, West Virginia Surface Mine Board Case Files, A&M 4141, various boxes).
II. Interdisciplinary Form & Craft
SJB: You are using erasure poetry in this exhibit. Can you talk about the symbolic power of “erasing” archival text to find a new story, especially when dealing with themes of ecological rupture and displacement?
LR: Yes! I think erasure poetry is a great form to explore what is hidden beneath official documents, especially when those documents are created to put forward specific communication strategies that obscure or wholly misrepresent facts. In this project, I used internal emails from two coal companies that were encouraging their employees to attend public hearings and make their voices heard. The companies positioned environmentalists as attackers who were threatening to take away people’s jobs and said that surface mining has not harmed the environment, but rather improved water quality. We know fear inspires action that often leads to violence and abuse of power in this country. Highlighting these remains through erasure can offer a kind of narrative correction.
SJB: The Visual and the Verbal: The WVU project is described as a “performance exhibit.” How do you see the relationship between the physical artifacts (letters, ephemera) and the spoken or written word in “Remain”?
LR: Thank you for this question! The spoken word is living breath. The cadence and emphasis on speaking out loud, of bearing witness out loud, is in alignment with the ethos of Remain. It is exactly what so many activist groups have had to do to raise awareness about unconscionable environmental harms. This is the hallmark of good citizenship: letting our voices be heard. These artifacts also are witnesses. I’m hopeful that by seeing the objects presented alongside the poems, people will imagine possibilities for archives in their own lives.
III. The Personal and the Regional
SJB: Your debut book Holler Root (University Press of Kentucky) explores moving from tobacco fields to coal mines. How does “Remain” act as a sequel or an evolution of that family narrative?
LR: While Remain is its own project, this work has provided me with even more context about my own family’s outmigration from West Virginia in the mid-1960s. This was a time when many miners began to lose their jobs, replaced by machinery that could do their work more “cost-efficiently.” My grandfather saw the writing on the wall with mechanization and decided to hang up his hat after working in McDowell County mines for 43 years. While he did not earn a high school diploma, he was able to support my grandmother and 10 children with underground mining. As stories go, he loved the woods, loved to hunt and snack on nature’s bounty. I can imagine he’d be devastated to see what mountaintop removal coal mining has done to the landscape he once knew like the back of his hand.
SJB: You often ask what inheritances serve our needs and what we must let go of. Regarding West Virginia’s industrial history, what do you feel the current generation needs to “keep” from our coal and mountain heritage, and what must be “reclaimed”?
LR: Above all, West Virginians are resourceful, hard-working people who are committed to taking care of beloveds—blood kin, chosen family, and non-human beings alike. History has demonstrated that we have great ingenuity to create bounty from our mountain places—growing gardens, gathering nuts, sharing river glass. I believe this sense of creativity and collectivity must be preserved, because that generosity of spirit is so needed these days.
SJB: How has being embedded within the university’s library changed your perspective on the role of the poet in a digital age? Do you see yourself more as a writer or a steward of these records?
LR: I will always see myself as a poet and storyteller. I grew up at the feet of my elders, listening and asking questions. A poet who I love, Nikky Finney, once said “poetry is the heart’s journalism.” I believe that. Stewardship is embedded in poems, which caretake through the sometimes-ache of daily life and offer a communal balm. Poems that do important work in the world are both records and inquiries.

SJB: You’ve said we must learn from the past to create sustainable futures. What is one thing you hope a student or visitor at the WVU Libraries takes away from “Remain” regarding their own relationship to the Appalachian landscape?
LR: I hope that visitors take away the message that what we do on this land matters and impacts so many human and non-human beings—those living and those who have yet to be born. I hope that visitors also consider the world that they want to live in, that they want their descendants to live in, and operate from that place of tending.
L. Renée
IG: @lreneepoems